How to create a new email
-
Click
 to create new email.
 - Click your account
 to expand drop-down menu and choose another account to send from.
 - To: enter the email of the recipient.
- Click Add Cc & Bcc to expand the Cc (Copy) and Bcc (Blicn copy) fields:
-
Cc: (Copy) Enter the email to send a copy of this email. The recipient of the copy will be visible to other recipients
-
Bcc: (Blind copy) Enter the email to send a blind copy. The recipient of the copy will not be visible to other recipients
- Enter subject
 .
. - You can edit your email text and highlight important items in editors toolbar
 and the More button
  .
. - Click Send to send your email. You can expand drop-down menu to select one of he options:
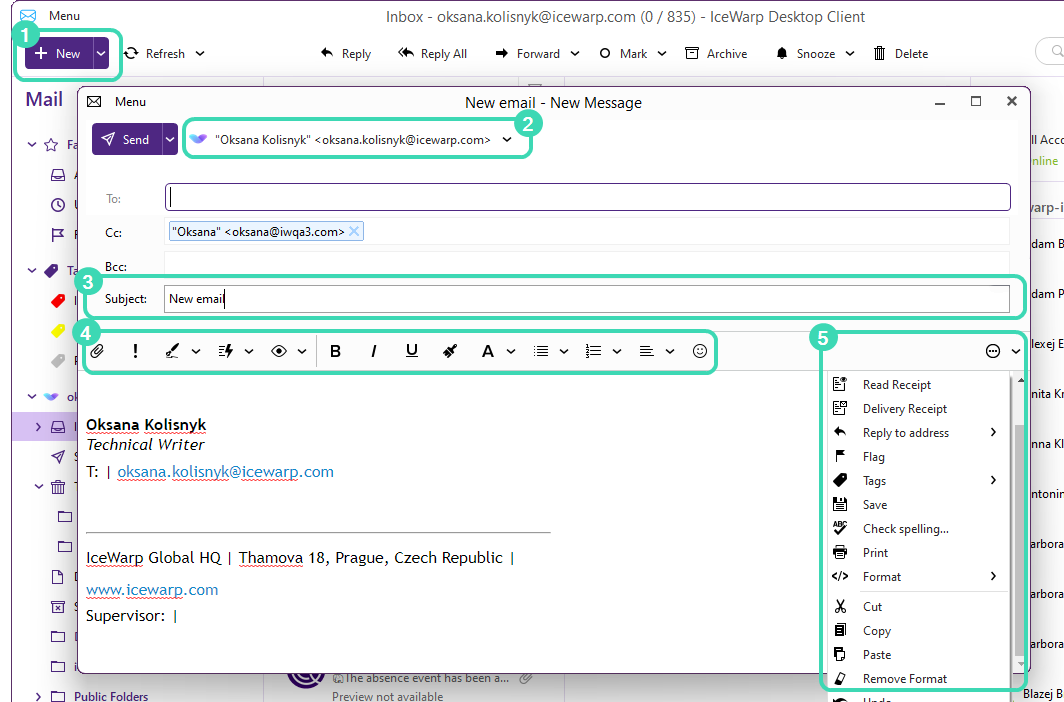
Figure. New message window.
Editors toolbar
The Editors toolbar allows to edit the font style, add signature and attachment, etc.
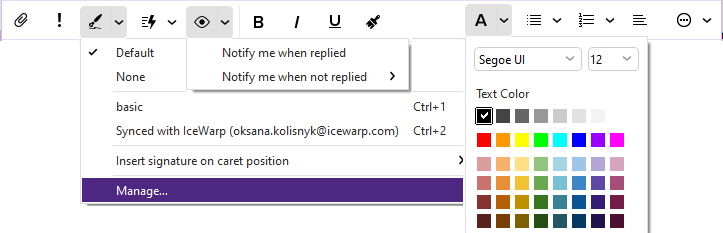
Figure. Editors toolbar.
-
 Attachment: You can add the attachments to your email by clicking on small paperclip icon.
Tip: OneDrive, Google Drive, Dropbox, OwnCloud and Nextcloud are now integrated for attachments.
-
 Clicking Important to send your email as urgent.
 -
 Click Signature to choose the signature for the message. (To set up signatures, click
  Menu in the top left of IceWarp Desktop Client > Settings > Mail > Templates and Signatures).
 -
 QuickText: Click this button and select a predefined text. To create a predefined text, click > Manage > New. Enter name of the text and type the text. Click Save. The next time you click , select the name of created text from the list and it appears in your email.
 -
 Watch for reply: Click to digitally sign your email with a security certificate so that the recipients can verify its authenticity.
 -
 Bold, Italic, Underline: The selected text will be bold, italic or underlined.
 -
 Paint Format: Select certain area of the text while holding right mouse button, click on the Paint Format button, and then hover over different area of the text to transfer the format of the original text to the newly selected area.
 -
 Font Style: click on the Font Style button to bring up following menu
 -
 Unordered list: Bullet point list.
 -
 Ordered list: Numbered list
 -
 Align: Justify text to the left, center, right or both sides.
 -
 Emoticons: to add emojis or GIFs to your email.
Tip: Right-click the toolbar to add or remove buttons, or to bring Customize option
More button
Click ![]() to bring up following additional features that could not fit in the toolbar:
to bring up following additional features that could not fit in the toolbar:
- Read receipt: sends notification after the recipient opens the email
-
Delivery receipt: sends notification of email delivery to recipient’s mailbox
-
Reply to address: allows to set up a different account for reply
-
Flag: adds an attention flag to the email
-
Tags: assigns a color-coded category to your email
-
Save : saves message as a draft
-
Check Spelling: checks the text for grammar mistakes
-
Print: prints the email
-
Format: formats the message body text to either HTML or plain text
-
Cut / Copy / Paste: places content to/from clipboard.
-
Remove Format: removes all formats from selected text
-
Font style: sets up the text and background color, font family and size
-
Undo: takes one edit back
-
Redo: repeats the most recently undone action
-
Outdent: moves selected text to the left (if this text was indent before)
-
Indent: moves selected text to the right
-
Insert link: adds a hyperlink to your email
-
Left to right / right to left: adjusts text orientation
-
Insert image: adds an image to your email
-
Insert table: adds a table to your email
-
Insert symbol: adds a symbol to your email
-
Customize: customizes the options present on email window

